Kegerator Placement Guide
Discover essential tips for optimal kegerator placement to enhance beer quality and service efficiency in your bar refrigeration & infrastructure setup.
HOME BAR GUIDES
Barkeepers BuzzBlog Editorial Team - Led by AJ “Buzz” Eichman
3/8/20264 min read
Proper kegerator placement is foundational to optimizing both functionality and efficiency within your home or commercial bar. The chosen location directly influences beer quality, pouring speed, and ease of maintenance. This guide outlines the essential considerations to achieve a seamless integration of your kegerator into your bar infrastructure.
For anyone building a dedicated bar setup at home, kegerator placement is just one part of a larger home bar blueprint, where refrigeration, workflow, and storage all work together.
Quick Verdict
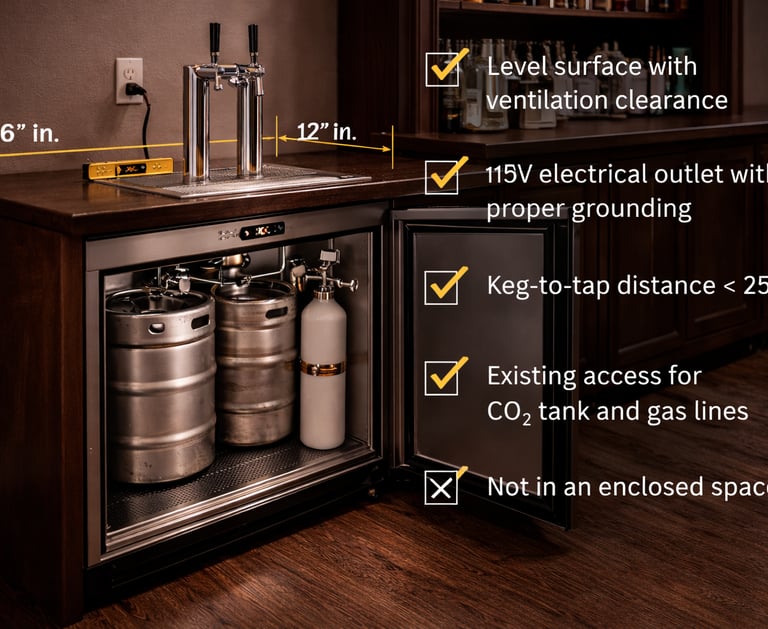
Maintain 6 inches of clearance behind the unit and 12 inches on each side to ensure adequate ventilation.
Keep the keg-to-tap distance under 25 feet to preserve beer temperature and carbonation integrity.
Opt for under-bar placement in compact layouts or back-bar placement when visibility and service ease are priorities.
Maintain operating temperature between 36°F and 40°F to avoid excessive foam or flat pours.
Understanding Kegerator Placement Fundamentals
A kegerator transcends the role of a mere refrigerated cabinet; it is a critical element within the broader bar refrigeration and draft system infrastructure. Thoughtful positioning supports optimal workflow, temperature stability, and convenient maintenance access. Particularly in commercial settings, balancing customer sightlines with staff efficiency is paramount.
Space and Clearance Needs
Industry standards recommend 6 inches of clearance at the back and roughly 12 inches on each side for proper ventilation. This spacing prevents compressor overheating and ensures consistent internal temperatures. Positioning the kegerator on a level surface is equally important to maintain door alignment and protect internal components over time.
In home bar environments, refrigeration placement often sits alongside other equipment like beverage fridges and bar refrigeration units, which serve a similar role in maintaining stable drink temperatures.
Keg-to-Tap Distance and System Design
Beer quality and pour consistency hinge on the distance beer travels from keg to faucet. Limiting this path to under 25 feet allows for a direct-draw system that does not require additional cooling mechanics. Longer runs often introduce temperature fluctuations, leading to foam issues and carbonation loss.
When distances exceed 25 feet, glycol-cooled tap systems are necessary. These circulate a glycol refrigerant through beer lines, maintaining cold, stable temperature from keg to tap. Omitting this can cause inconsistent pours and accelerate spoilage.
Gas pressure also demands precise control, ideally maintained between 8 and 12 PSI for most beers to balance carbonation without inducing excessive foam.
Understanding draft beer systems also benefits from knowing the differences between lager and ale brewing styles, since carbonation levels and serving temperatures often vary between them.
Under-Bar vs. Back-Bar Configurations
Choosing between under-bar and back-bar placements depends on spatial constraints and service volume:
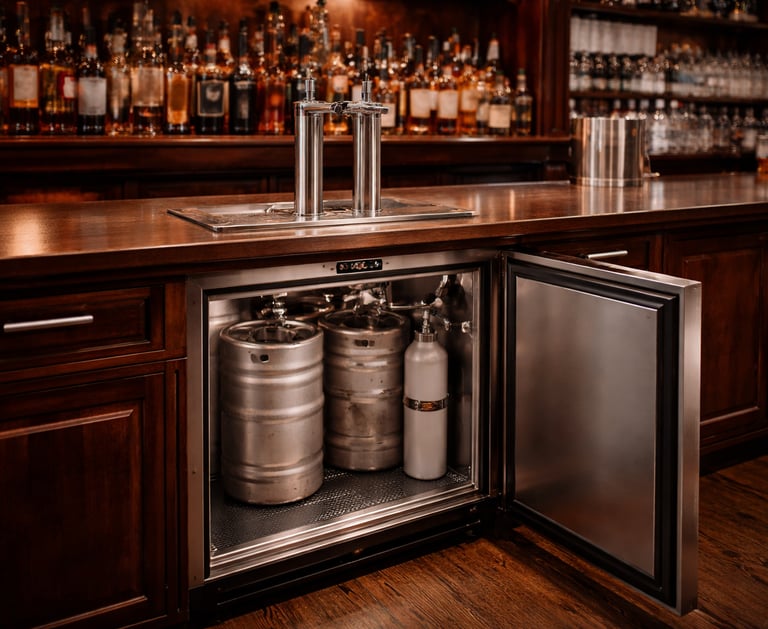
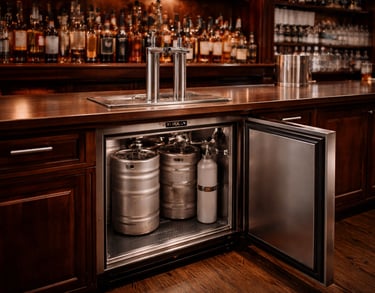
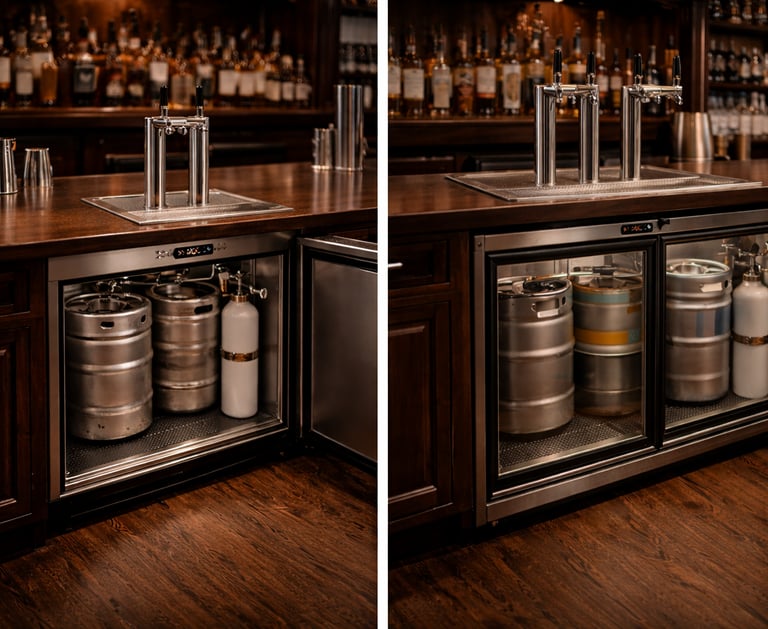
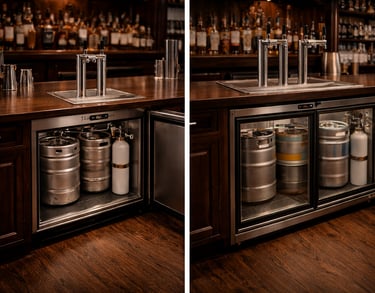
Under-bar units maximize compactness, placing kegs near the point of service. This minimizes beer line length and simplifies system integration, ideal for smaller bars or home environments.
Back-bar refrigeration often features glass fronts that showcase keg contents, favoring bartender convenience in high-volume settings. These setups may require longer beer lines and advanced temperature control measures.
Pass-through kegerators—accessible from both front and back—further enhance service efficiency in busy commercial bars.
These refrigeration choices often appear alongside other bar equipment when building a full home bar blueprint, especially when balancing layout efficiency with visual presentation.
Workflow Integration and Staff Accessibility
Positioning the kegerator along main service pathways reduces steps and expedites pouring. Placement should allow unobstructed monitoring and adjustment of CO₂ pressure and facilitate swift keg swaps without interrupting staff movement or customer experience.
In high-volume service environments, equipment placement becomes just as important as selecting the right bar tools and serving equipment that bartenders rely on throughout the shift.
Temperature and Environmental Considerations
Maintaining precise internal temperature is critical:
Above 40°F: increased foam and accelerated spoilage occur.
Below 36°F: beer risks becoming flat from over-chilling.
Environmental factors, such as proximity to heat sources or direct sunlight, compromise temperature control. Position your kegerator away from these influences to maintain consistent performance.
Proper refrigeration management often overlaps with other beverage storage systems, such as dedicated beverage refrigerators designed for bar environments.
Installation Planning Checklist
Place on a level surface with at least 6 inches clearance behind and 12 inches on each side for ventilation.
Ensure access to a dedicated 115V electrical outlet with proper grounding.
Confirm keg-to-tap distance remains under 25 feet to mitigate foam issues.
Provide unimpeded access for gas lines, CO₂ tanks, and routine maintenance.
Avoid enclosed spaces that trap heat and reduce cooling efficiency.
Select an under-bar or back-bar model suited to your space and operational demands.
Common Mistakes
Neglecting clearance guidelines, leading to ventilation problems and compressor strain.
Installing the kegerator too far from taps, degrading beer temperature and inducing foam.
Failing to regulate CO₂ pressure within 8–12 PSI, causing inconsistent carbonation.
Situating units near heat sources or in direct sunlight, impairing refrigeration performance.
Attempting complex draft system installations without professional expertise, resulting in poor pours and increased waste.
FAQ
How much space does a kegerator need?
Plan for 24–36 inches in width and 30–36 inches in depth, with an additional 6 inches clearance behind and 12 inches on each side for ventilation.
What is the ideal keg-to-tap distance?
Maintaining this distance under 25 feet preserves beer temperature and carbonation without specialized cooling.
Should I install my kegerator under the bar or in the back?
Under-bar placement suits small, compact operations; back-bar placement enhances visibility and supports high-volume service.
How important is CO₂ pressure in draft beer quality?
Critical—it should be maintained between 8 and 12 PSI to balance carbonation and minimize foam.
Can I install a kegerator anywhere in my bar?
No. Avoid areas near heat sources or lacking ventilation to guarantee efficient cooling and reliable performance.
What is the professional recommendation for complex draft systems?
Professional installation optimizes line length, balances pressure, and ensures adequate cooling to prevent foam and product loss.
How do I handle keg changes and maintenance?
Select a location granting straightforward access to the keg and regulator without disrupting workflow or requiring extensive disassembly.
Continue Building Your Bar Setup Knowledge
If you're planning a complete draft system or expanding your bar infrastructure, it helps to understand how refrigeration, storage, and equipment layout all connect inside a modern home bar setup.
You may also want to explore guides on kegerators designed for home bars, including features that influence placement, cooling performance, and draft system efficiency.
© 2026 Barkeepers Buzz. All rights reserved.
Barkeepers Buzz
Master cocktails, spirits, and bar knowledge with clarity and precision. Built for serious home enthusiasts.
Crafted with respect for the culture — and the responsibility that comes with it.
For educational purposes only. Intended for legal drinking age audiences. Please drink responsibly.
General Inquiries: