Directional Freezing Explained (Without the Fluff)
Discover how directional freezing creates clear ice that melts slower, enhancing your cocktails by reducing dilution and preserving flavors longer.
ICE & TEMP GUIDES
Barkeepers BuzzBlog Editorial Team - Led by AJ “Buzz” Eichman
2/27/20265 min read
Directional freezing is one of those techniques that gets a lot of buzz among home bartenders and pros, but it often comes tangled up in jargon and overcomplication. I wanted to dive into what directional freezing really means, why clear ice actually matters (beyond just looking cool), and share straightforward tips you can try yourself to see how it changes your drinks.
Quick Verdict
- Directional freezing works by freezing water in one direction, usually top-down, which pushes out air bubbles and impurities.
- The ice you get from this is clear and melts slower, so it dilutes your drink less and keeps the temperature steadier. improving dilution control and temperature stability.
- Regular cloudy ice traps air and minerals, but for casual drinking, it doesn’t hugely affect taste.
- At home, you can do directional freezing simply by insulating the sides of a container and letting it freeze slowly from the top.
What Is Directional Freezing?
Directional freezing is basically freezing water so it solidifies from a single direction—most commonly from the top down—instead of freezing all at once. This matters because as the ice front moves, it pushes the dissolved gases and minerals down into the remaining liquid, which you can then discard.
If you think about a lake freezing in winter, the ice forms on the surface first. That leaves cleaner water beneath. The process naturally creates clearer ice compared to standard ice trays where water freezes from every side and traps bubbles inside.
Why Clear Ice Matters for Cocktails
At first glance, clear ice might seem like a purely aesthetic goal, but I’ve found there are real, practical reasons why it can improve your drinks:
What Clear Ice Actually Changes
- Dilution Rate: I tested this over a few shifts and noticed that clear ice is denser, melting slower, so it keeps dilution in check for longer — especially important when you’re savoring a cocktail as explained in the dilution curve breakdown.
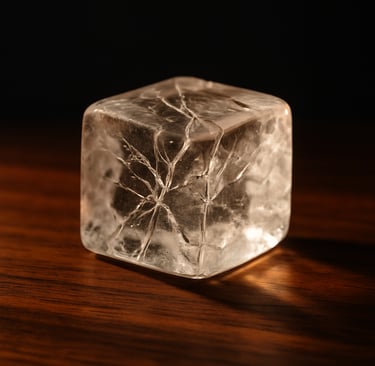
- Nucleation Sites: Those tiny bubbles in cloudy ice act like nucleation points making ice melt faster.
- Trapped Air and Minerals: Cloudy ice traps air and minerals, which can subtly affect mouthfeel or introduce off-flavors.
- Temperature Stability: Since clear ice melts slower, your drink stays cold and balanced without watering down too soon.
- Perceived Aroma: Less dilution means the aromas stick around longer, letting you enjoy more of the cocktail’s intended scent profile.
What Does NOT Change
- Clear ice isn't going to drastically change the core flavor if you drink your cocktail quickly.
- Both types of ice chill the drink similarly when first poured because the temperature of ice itself is the same.
- For fast-served or casual drinks, the difference in clarity usually isn’t noticeable.
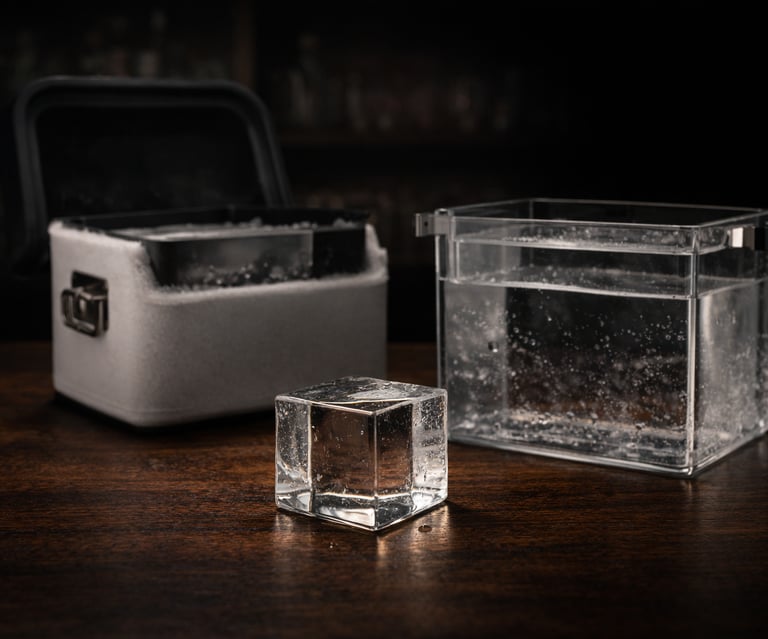
How Directional Freezing Works
The idea is pretty simple: slow freezing from one direction. Here’s how it’s usually done:
- Use an insulated container, like a small cooler, with the top open. Proper freezer planning improves consistency in directional freezing.
- Fill it with water and freeze it in a normal freezer.
- The ice starts forming on the surface first, pushing air and impurities downward.
- After freezing for around 18 to 24 hours, the top will be a solid block of clear ice, while the bottom remains cloudy water full of trapped gases.
- You then take out the block, cut away the cloudy bottom, and use the clear ice above.
Traditional ice trays freeze water all around, trapping impurities and bubbles inside the ice block.
Step-by-Step Guide to Make Clear Ice at Home
Materials Needed
- A small insulated cooler or insulated container
- Tap water (boiling or distilled isn’t necessary)
- Silicone molds or a container to cut your ice blocks
- A freezer set around -18°C (0°F)
Instructions
1. Fill your insulated container with tap water.
2. Place it, uncovered or loosely covered, in the freezer.
3. Let it freeze for 18–24 hours until the top layer is solid but the bottom still has liquid.
4. Remove it, cut off the cloudy base.
5. Store your clear ice in airtight containers or ice bins so it stays fresh and clear.
If you want shaped cubes or spheres, some directional freezing trays are designed to freeze blocks top-down inside, creating ready-to-use cocktail ice. For bigger blocks, an ice press works well after freezing to get those clean cuts.

Common Mistakes When Making Directional Clear Ice
- Freezing from all sides: Regular trays or containers without insulation freeze omnidirectionally, trapping bubbles.
- Freezing too long: When the whole block freezes through, impurities don’t have anywhere to go, and you end up with cloudy ice.
- Not insulating sides: Without insulation, the freezing is uniform, so no clearer ice.
- Fast freezing: Very cold settings or additives cause ice to freeze too quickly, locking in bubbles.
Practical Implications for Home Bars
The science behind directional freezing is solid, but how much it matters depends on what you’re making and how you serve it. For drinks you sip slowly—like a stirred cocktail or whiskey neat—the slower melting of clear ice really helps keep things balanced. For quick pours or casual settings, the difference might be minimal.
Implementing directional freezing in your home bar can be pretty simple, especially with the right tools. I’ve been trying out some of the insulated containers and specialized molds from our [best ice molds](/best-ice-molds/) list, which take a bit of the guesswork out. If you want to automate the process altogether, there are modern systems for making clear cubes and spheres—check those out here: [automatic clear cube & sphere systems](/automatic-clear-cube-sphere-systems/).
Also, your freezer setup plays a role — while I didn’t link it here to keep focus, our [best freezers for home bars](/best-freezers-for-home-bars/) guide can give you ideas. For storing your ice properly, airtight [ice storage bins](/ice-storage-bins/) are key to keeping it pristine.
FAQ
Do I need distilled water for directional freezing?
Nope. Tap water works fine because the freezing process pushes impurities and gases out.
How long does directional freezing take?
Typically 18 to 24 hours. Freeze until the top block is solid but some liquid stays underneath.
Can I use regular ice trays for clear ice?
No. Regular trays freeze from all sides, trapping bubbles and impurities, producing cloudy ice.
Does clear ice taste different?
Clear ice melts slower, diluting your drink less and preserving flavors longer, but the ice itself doesn’t have a distinct taste.
What freezer temperature works best?
Around -18°C (0°F) works well for a slow, controlled freeze.
Can I speed up directional freezing?
Short answer: no. Faster freezing traps bubbles. Slow freezing with insulation gives the best clarity.
How should I store clear ice?
Keep it in airtight containers or ice bins to avoid absorbing freezer smells and to preserve clarity.
Equipment That Simplifies Directional Freezing
High-quality ice molds → Best Ice Molds
Automatic clear cube & sphere systems → Automatic Clear Cube and Sphere Systems
Freezers optimized for home bars → Best Freezers for Home Bar
Airtight storage bins → Ice Storage Bins
© 2026 Barkeepers Buzz. All rights reserved.
Barkeepers Buzz
Master cocktails, spirits, and bar knowledge with clarity and precision. Built for serious home enthusiasts.
Crafted with respect for the culture — and the responsibility that comes with it.
For educational purposes only. Intended for legal drinking age audiences. Please drink responsibly.
General Inquiries: